本帖最后由 beebird 于 2017-4-3 16:45 编辑
【NUCLEO-L496ZG评测】+ 1)开发环境搭建
【NUCLEO-L496ZG评测】+ 2)GPIO测试方法
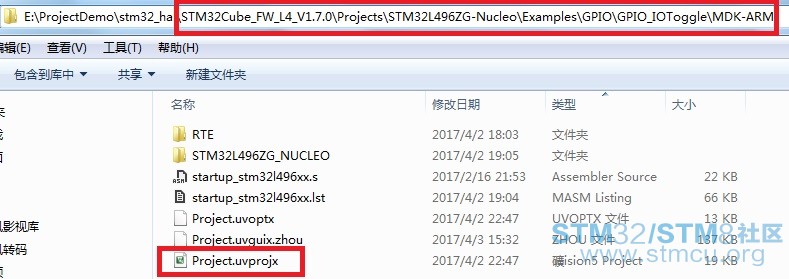
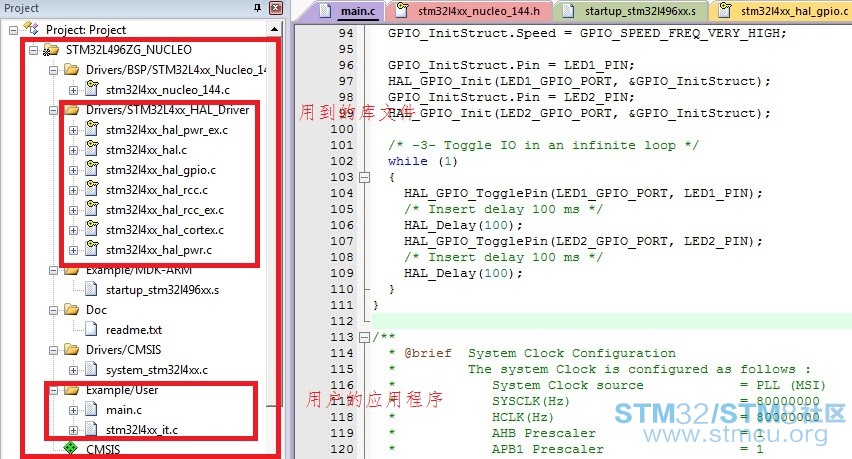
我本小菜,所以写的测评也比较low,还望各位大神指导。对于GPIO的测试有两种方法。一.使用【NUCLEO-L496ZG评测】+ 1) 开发环境搭建中所介绍的使用STM32CubeMX生成基本的项目代码,然后在Keil uVision5中根据功能需求改代码。二.直接使用官网下载的GPIO例程,如图“例程所在的位置”。点击Project.uvprojx打开工程后编译即可。
剪切项目中的代码如下:
- int main(void)
- {
- /* This sample code shows how to use GPIO HAL API to toggle LED1 and LED2 IOs
- in an infinite loop. */
- /* STM32L4xx HAL library initialization:
- - Configure the Flash prefetch
- - Systick timer is configured by default as source of time base, but user
- can eventually implement his proper time base source (a general purpose
- timer for example or other time source), keeping in mind that Time base
- duration should be kept 1ms since PPP_TIMEOUT_VALUEs are defined and
- handled in milliseconds basis.
- - Set NVIC Group Priority to 4
- - Low Level Initialization
- */
- HAL_Init();
- /* Configure the system clock to 80 MHz */
- SystemClock_Config();
-
- /* -1- Enable GPIO Clock (to be able to program the configuration registers) */
- LED1_GPIO_CLK_ENABLE();
- LED2_GPIO_CLK_ENABLE();
- /* -2- Configure IO in output push-pull mode to drive external LEDs */
- GPIO_InitStruct.Mode = GPIO_MODE_OUTPUT_PP;
- GPIO_InitStruct.Pull = GPIO_PULLUP;
- GPIO_InitStruct.Speed = GPIO_SPEED_FREQ_VERY_HIGH;
- GPIO_InitStruct.Pin = LED1_PIN;
- HAL_GPIO_Init(LED1_GPIO_PORT, &GPIO_InitStruct);
- GPIO_InitStruct.Pin = LED2_PIN;
- HAL_GPIO_Init(LED2_GPIO_PORT, &GPIO_InitStruct);
- /* -3- Toggle IO in an infinite loop */
- while (1)
- {
- HAL_GPIO_TogglePin(LED1_GPIO_PORT, LED1_PIN);
- /* Insert delay 100 ms */
- HAL_Delay(100);
- HAL_GPIO_TogglePin(LED2_GPIO_PORT, LED2_PIN);
- /* Insert delay 100 ms */
- HAL_Delay(100);
- }
- }
|


 微信公众号
微信公众号
 手机版
手机版
