
|
首先感谢社区举办的活动让我们以九块九包邮的价格用上了最新的L4系列NUCLEO开发板,我对L4系列还是情有独钟的。15年一次找资料的机会接触到了与非网STM32社区,刚好那个时候社区在举办NUCLEO-L476RG的活动最后还有幸中了一块,也是我的第一块NUCLEO板卡一年多的时间这块板卡一直还在用着。 其实周四(3月30日)就收到板卡了,今天刚好没什么事来个简单的评测。虽然社区已经有了一些分享了但是自己动动手写写东西也算做笔记吧,从官方抠了一些NUCLEO-L496ZG的一些介绍,英文更准确直白就不翻译了。 The ST Zio connector, which extends the Arduino™ Uno V3 connectivity, and the ST morpho headers provide an easy means of expanding the functionality of the Nucleo open development platform with a wide choice of specialized shields. The STM32 Nucleo-144 board does not require any separate probe as it integrates the ST-LINK/V2-1 debugger/programmer. The STM32 Nucleo-144 board comes with the STM32 comprehensive software HAL and LL libraries, and various packaged software examples. Key Features STM32 microcontroller in LQFP144 package SMPS: significantly reduces power consumption in Run mode, by generating Vcore logic supply from an external DC/DC converter. This function is only available on ‘-P’ suffixed boards 3 user LEDs 2 push-buttons: USER and RESET LSE crystal: 32.768 kHz crystal oscillator 2 types of extension resources: ST Zio connector including: support for Arduino™ Uno V3 connectivity (A0 to A5, D0 to D15) and additional signals exposing a wide range of peripherals ST morpho extension pin header footprints for full access to all STM32 I/Os USB OTG or full-speed device with Micro-AB connector 4 source options for power supply: E5V from ST morpho connectors ST-LINK/V2-1 USB connector USB charger VIN (7 - 12 V) from ST Zio connector On-board ST-LINK/V2-1 debugger/programmer with SWD connector: ST-LINK/V2-1 standalone kit capability USB re-enumeration capability: virtual COM port, mass storage, debug port Comprehensive free software HAL and LL libraries including a variety of software examples Support of a wide choice of Integrated Development Environments (IDEs) including IAR™ , Keil® , GCC-based IDEs 
这个型号因为没有以太网功能所以板子做的更加简洁了。 需要资料的可以去这里下载:NUCLEO-L496ZG资料 下来来几张开箱图吧,这里小小吐槽一下,板卡的包装被剪掉了,让我这强迫症患者情何以堪呀,看着心里真是不舒服。还有板子背面的有被焊接的痕迹,有遇到这情况的小伙伴吗。    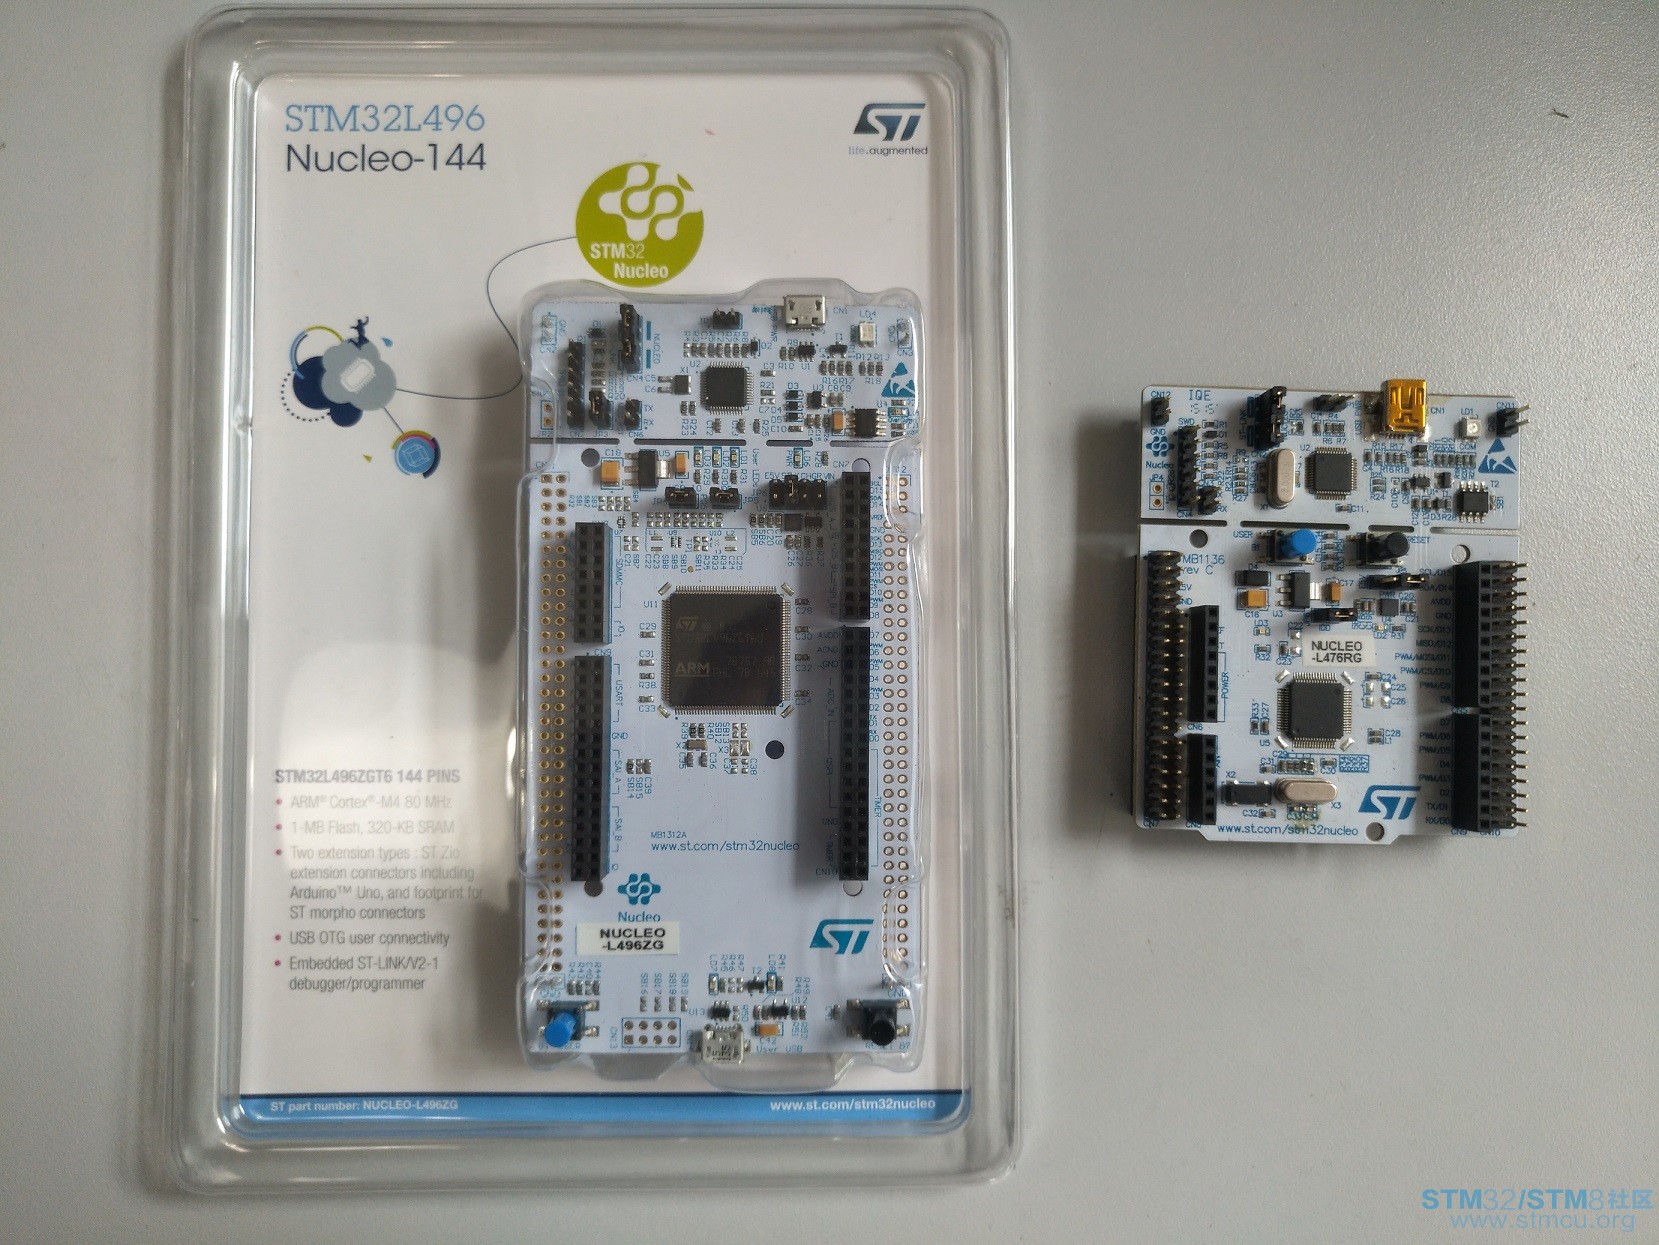

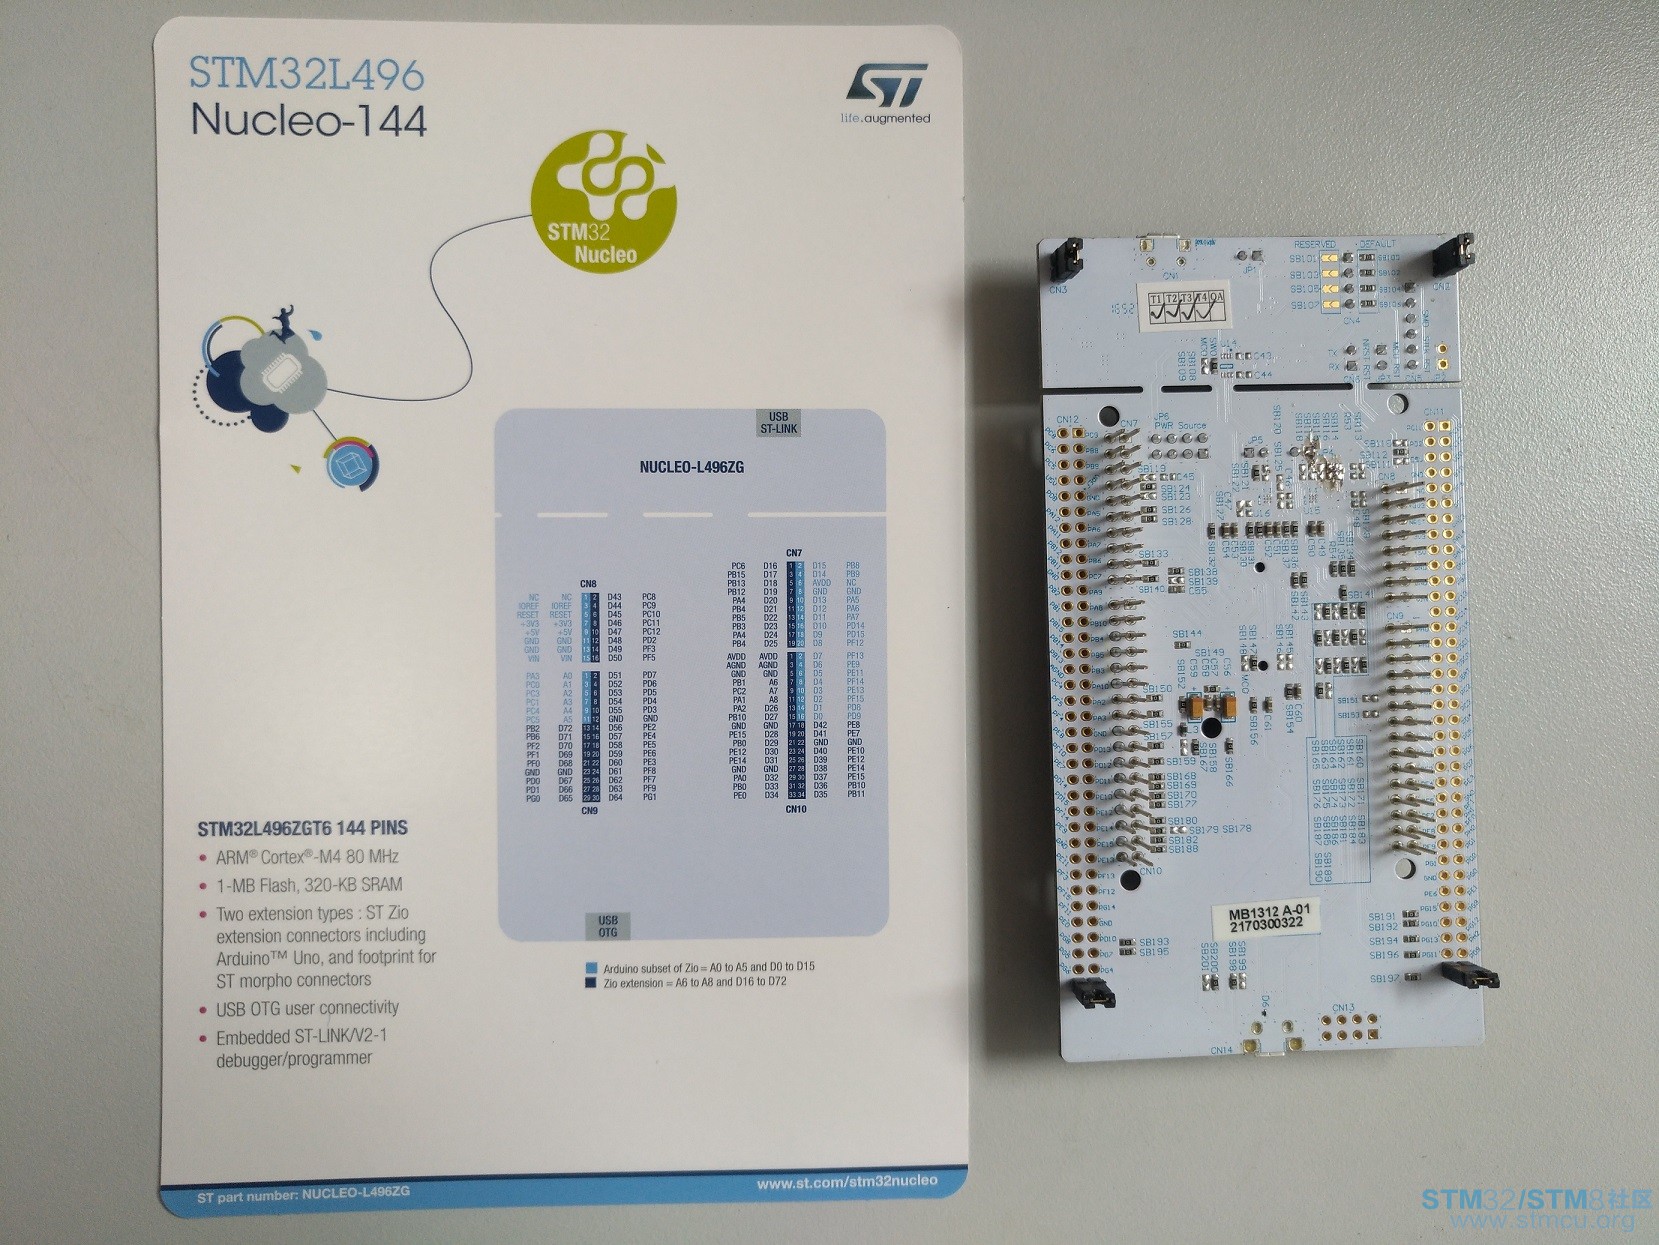
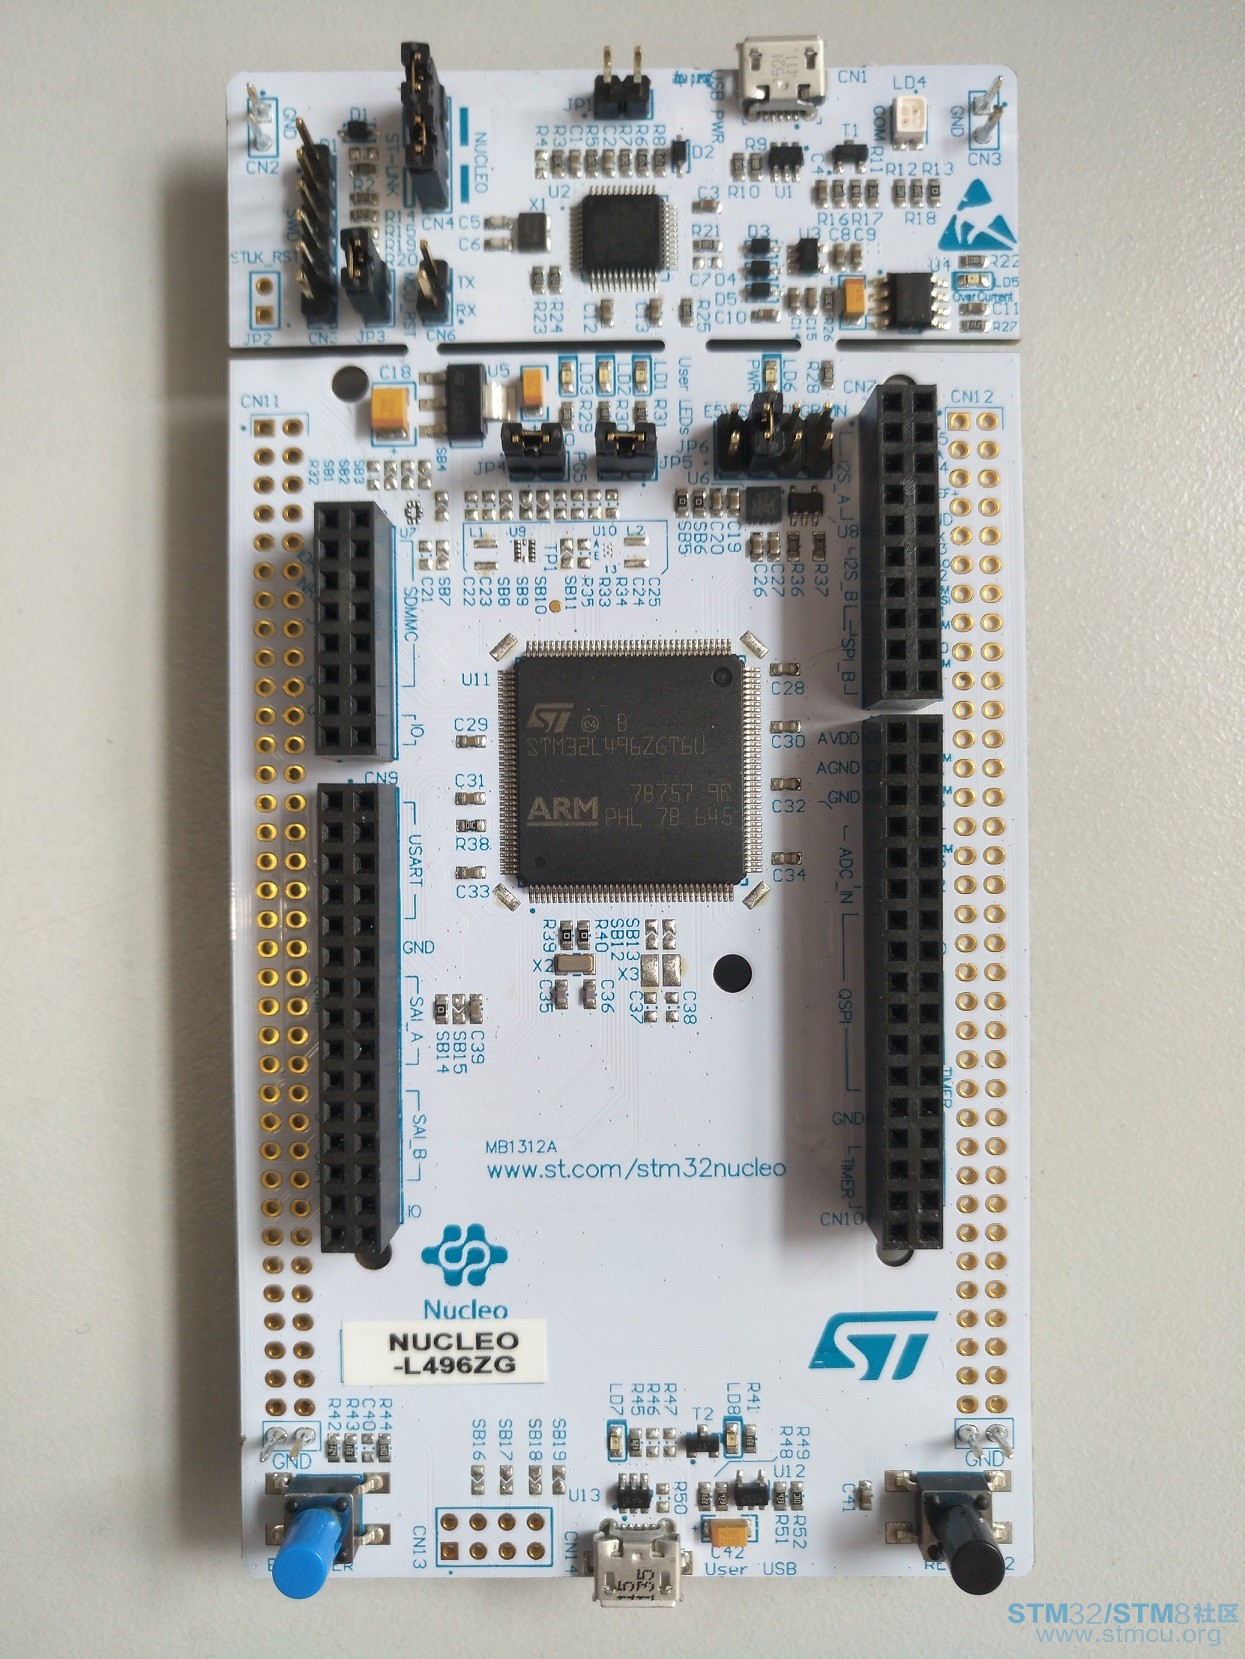

好在板子功能没收到影响,上电之后的demo程序是可以通过板载的蓝色用户按钮切换三个用户led以一定的频率闪烁,这里就不展示了。 应用官方的CUBEMX软件可以很容易的生成初始化代码然后可以选择不同的开发平台很是方便。根据官方的原理图,我们选择对应的串口,这块板卡与ST-LINK连接的是LPUART1对应的引脚是PG7 PG8。 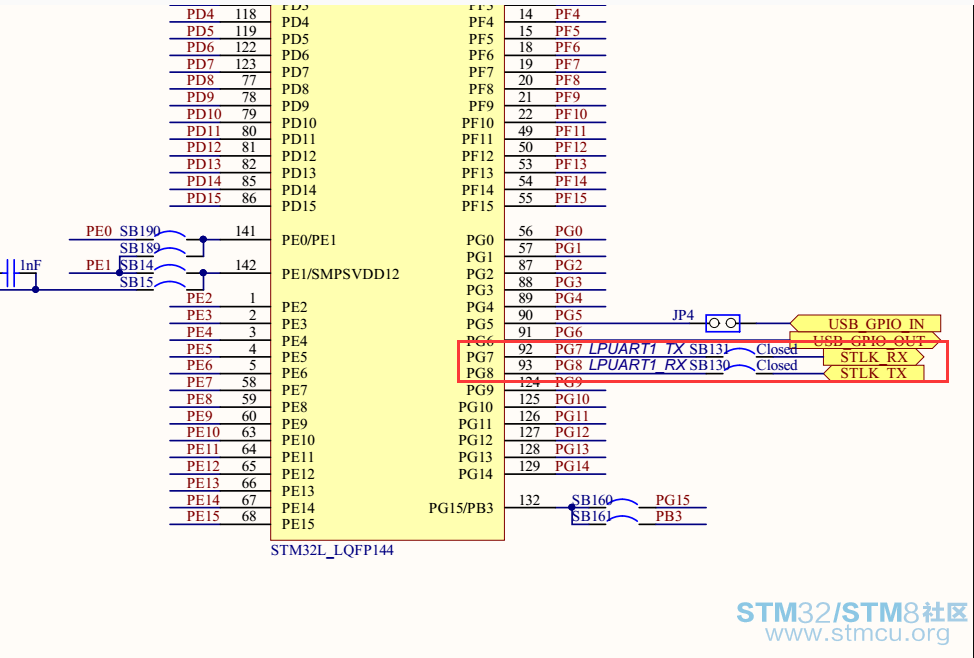

下来是时钟的选择,因为Coremark跑分需要运行到最高频率,所以我们这里设置到最大80MHz。这里要注意一下要选择MSI作为输入时钟源,我开始选择的是HSI串口出现乱码,原因还没找到。 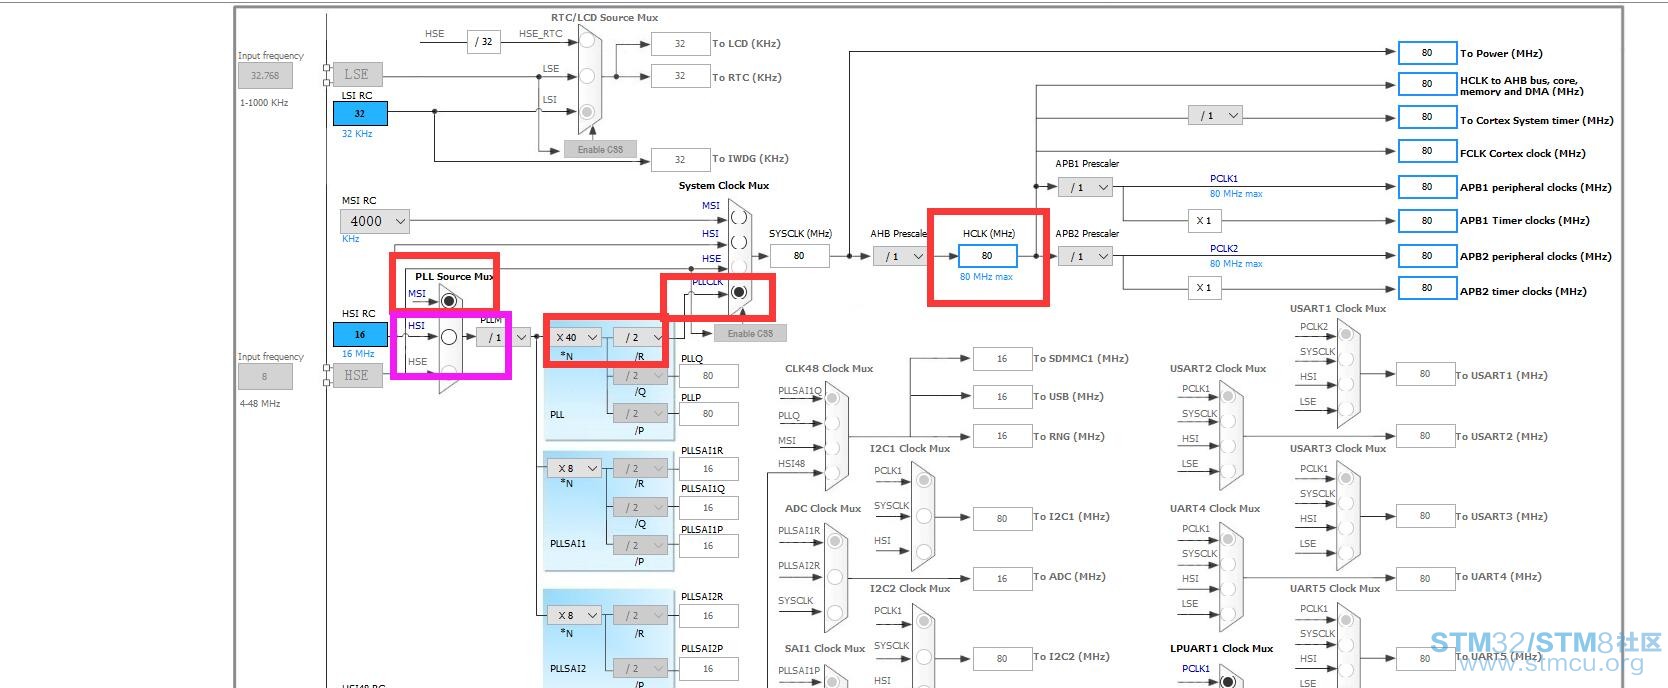
串口的设置比较简单了。 
生成对应工程的时候注意堆栈设置的尽量大一些。 
不出意外的话,稍等片刻就可以看到跑分结果了。不同的平台优化差别还是蛮大的下边两张图分别是MDK和IAR的分数(209和265),看来IAR的优化还是好一些。 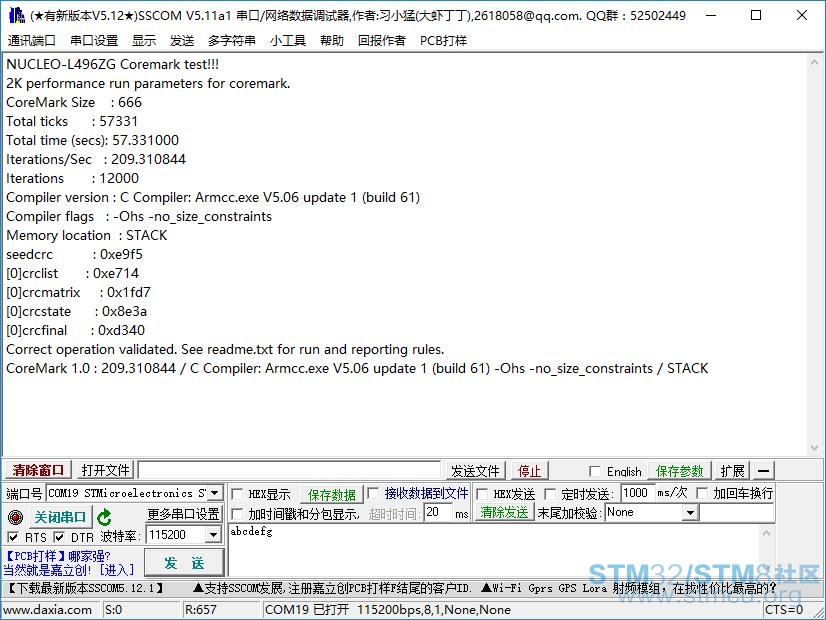

下边是跑分期间的功耗情况。 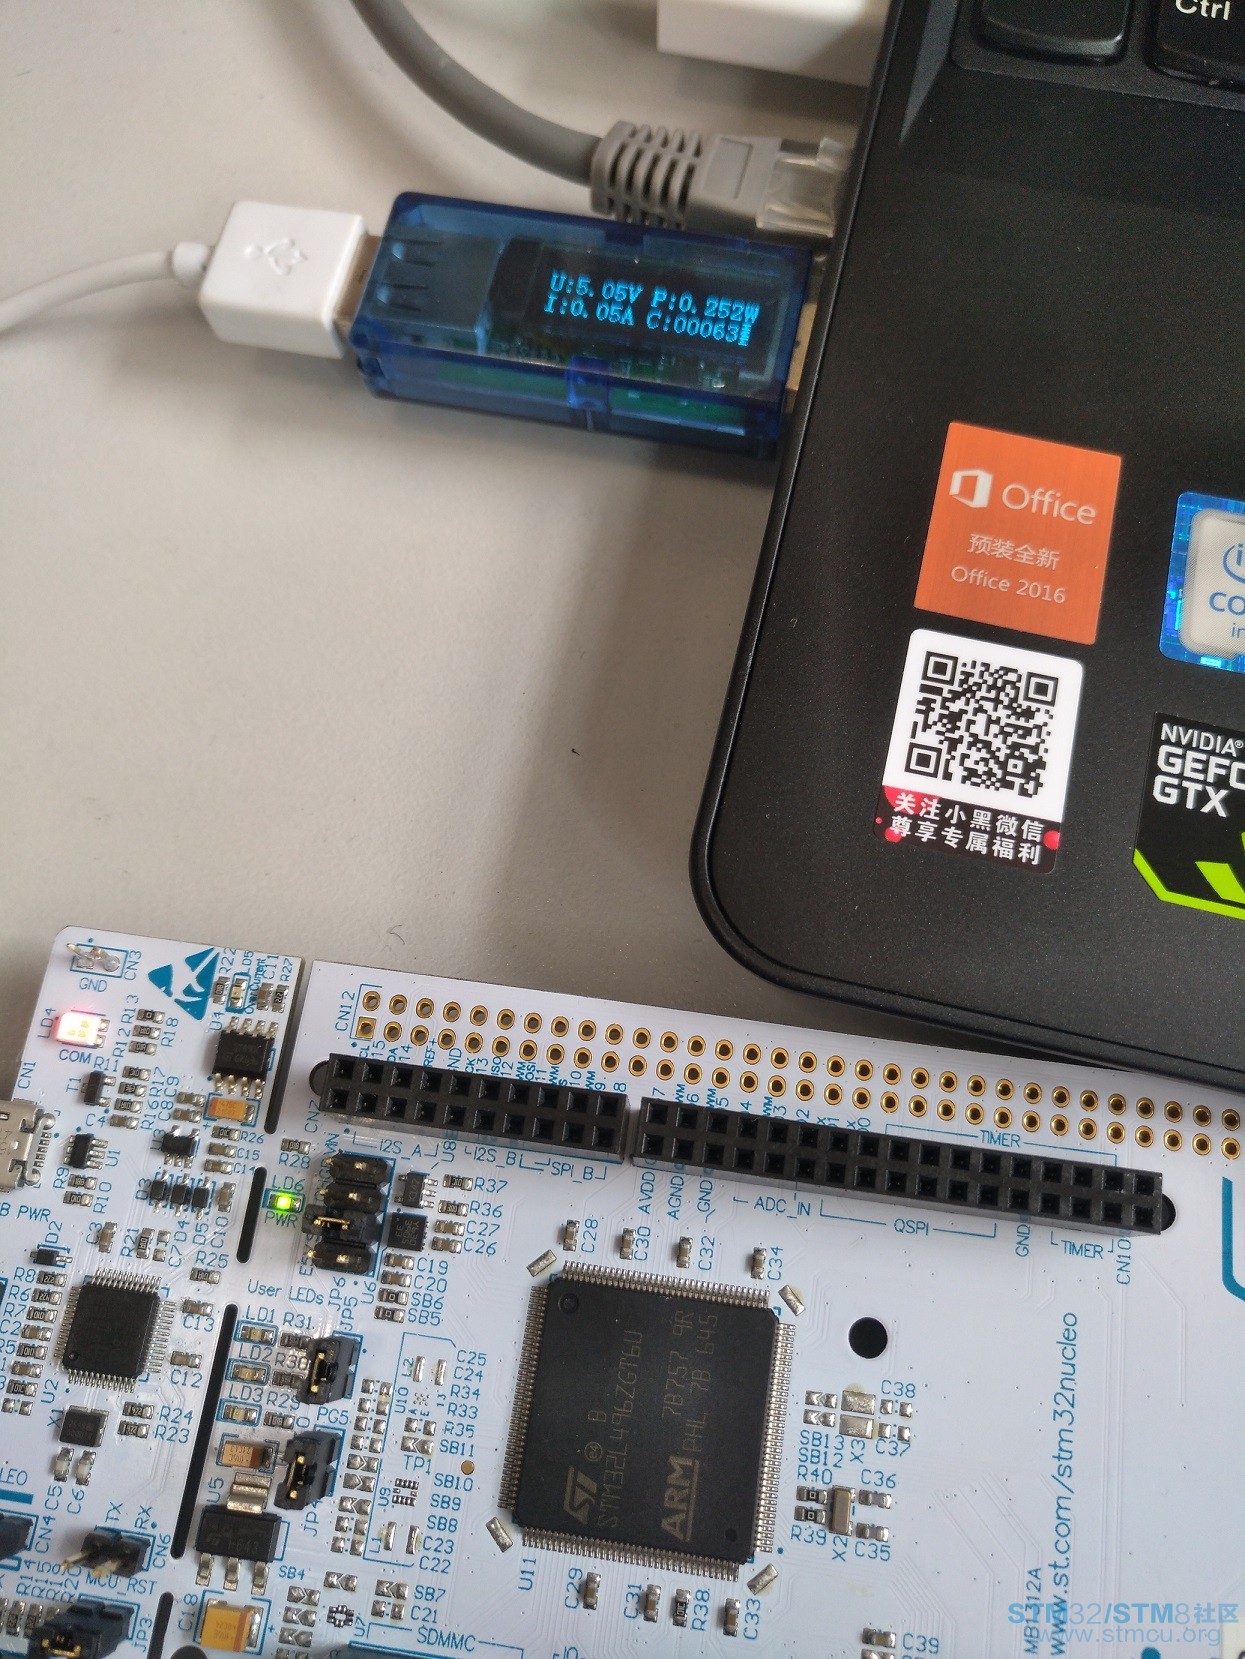
今天先到这里,后续再测试一下板卡的其他特性。贴上板卡原理图和跑分工程: 原理图:  MB1312.pdf
(2.06 MB, 下载次数: 6)
|
我的也被剪了,, |
感谢分享 |
 微信公众号
微信公众号
 手机版
手机版
