|
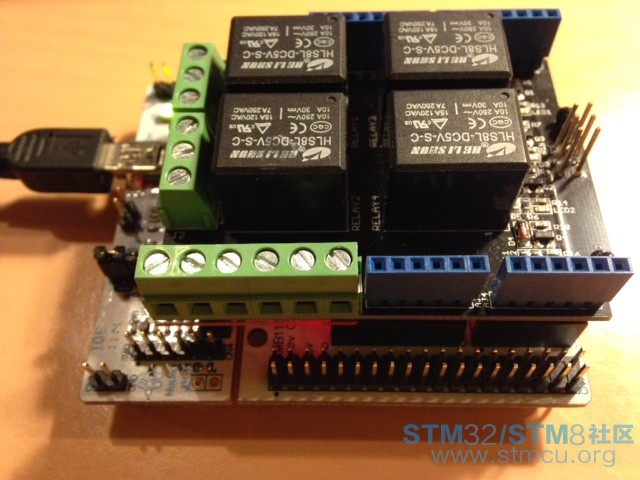
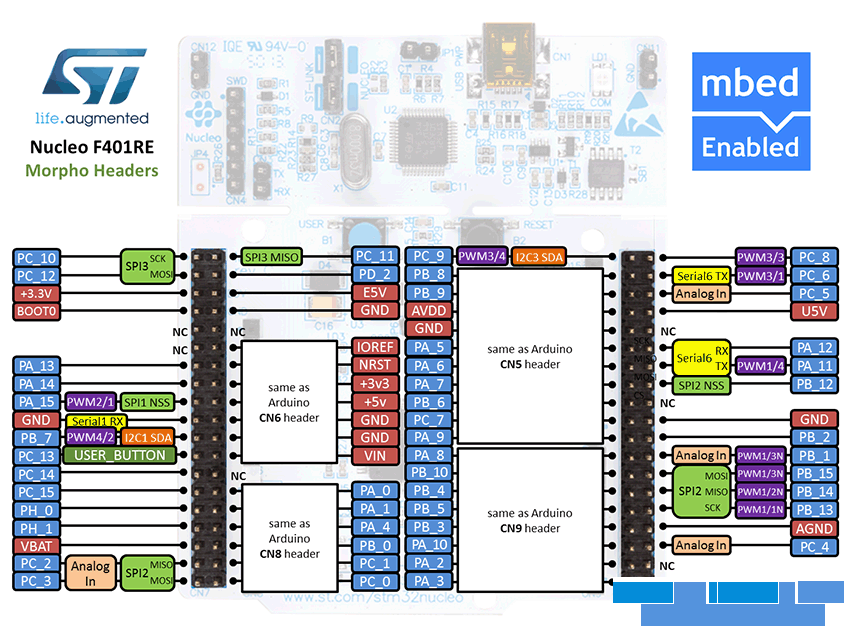
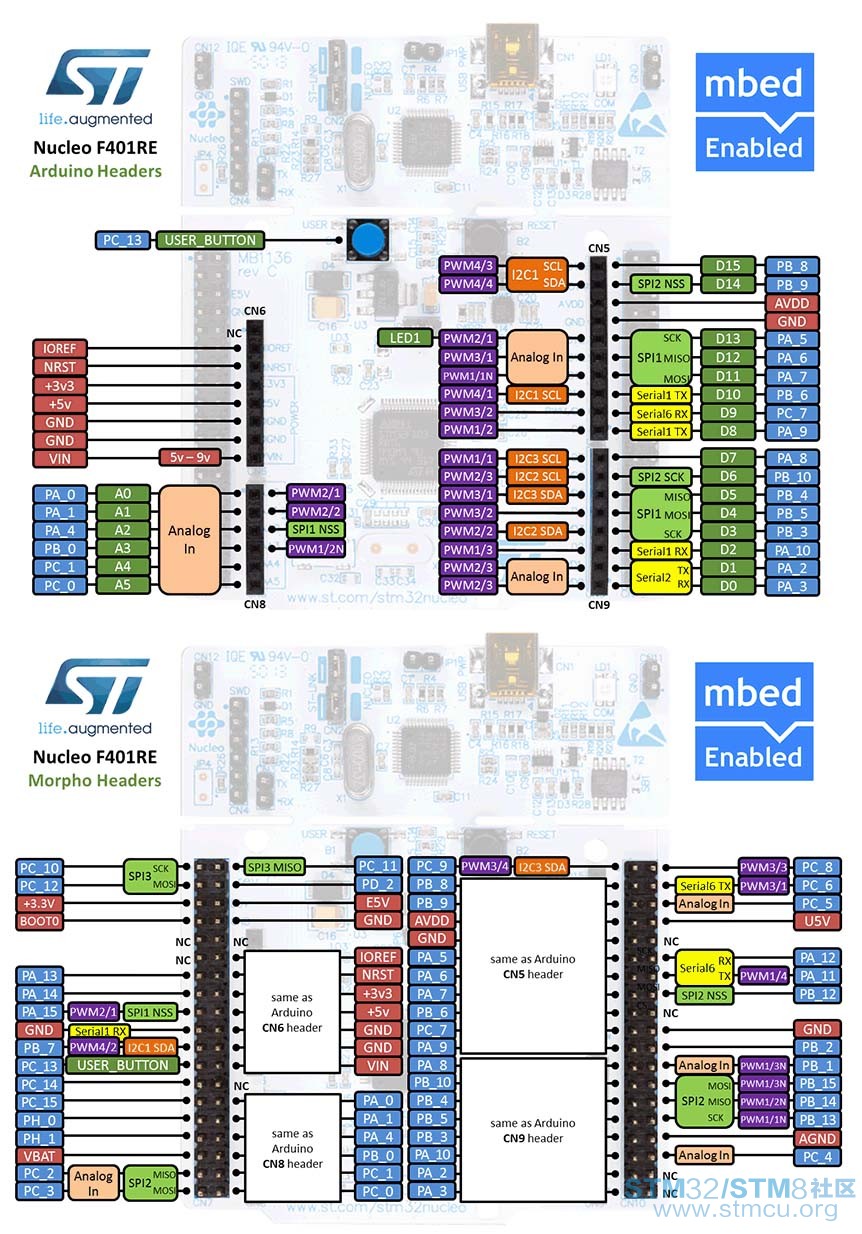
ARM®mbed OS入门开发(三 F)Nucleo 控制继电器 #include"mbed.h"; //按下蓝色按键后四个继电器动作 Serial pc(SERIAL_TX, SERIAL_RX); // This is USART2 tx, rx - It is used for debug (Usb Virtual Com) Serial device(PB_6, PA_10); // This is USART1 tx, rx //------------------------------------ // UART configuration: // 9600 bauds, 8-bit data, no parity //------------------------------------ DigitalIn mybutton(USER_BUTTON); DigitalOut LED(PA_5); DigitalOut RL1(PA_8); // 继电器n.1 DigitalOut RL2(PB_10); // 继电器 n.2 DigitalOut RL3(PB_4); //继电器 n.3 DigitalOut RL4(PB_5); //继电器n.4 #define NonPremuto 1 #define Premuto 0 void OnRELE_forTime(int Rele, float Tempo); int main() { while(1) { if (mybutton == Premuto) { // Button is pressed LED = !LED; // Toggle the LED state OnRELE_forTime(1, 2); // ON RL1 for 2sec OnRELE_forTime(2, 2); // ON RL2 for 2sec OnRELE_forTime(3, 2); // ON RL3 for 2sec OnRELE_forTime(4, 2); // ON RL4 for 2sec } } } void OnRELE_forTime(int Rele, float Tempo) { if (Rele == 1) { RL1 = 1; wait(Tempo); RL1 = 0; } if (Rele == 2) { RL2 = 1; wait(Tempo); RL2 = 0; } if (Rele == 3) { RL3 = 1; wait(Tempo); RL3 = 0; } if (Rele == 4) { RL4 = 1; wait(Tempo); RL4 = 0; } } 
注:使用的是[size=0.7em]Seeed Studio的继电器盾板 [size=0.7em]Seeed Studio http://wiki.seeedstudio.com/wiki/Main_Page 源程序基于NUCLEO-F334R8 |
先占楼备用

|
| 厉害 |
| 好资料,学习中。。。。 |
| 感谢分享 |
          :) :) |
 |
| 非常感谢!分享! |
 微信公众号
微信公众号
 手机版
手机版
