
1:HC-SR04超声波测距原理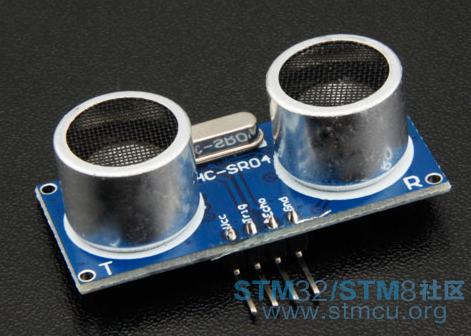
HC-SR04超声波测距模块可提供2cm-400cm的非接触式距离感测功能,测距精度可达高到3mm;模块包括超声波发射器、接收器与控制电路。 基本工作原理: (1)采用IO口TRIG触发测距,给最少10us的高电平信号。 (2)模块自动发送8个40khz的方波,自动检测是否有信号返回; (3)有信号返回,通过IO口ECHO输出一个高电平,高电平持续的时间就是超声波从发射到返回的时间。 测试距离=(高电平时间*声速(340M/S))/2 2:超声波时序图 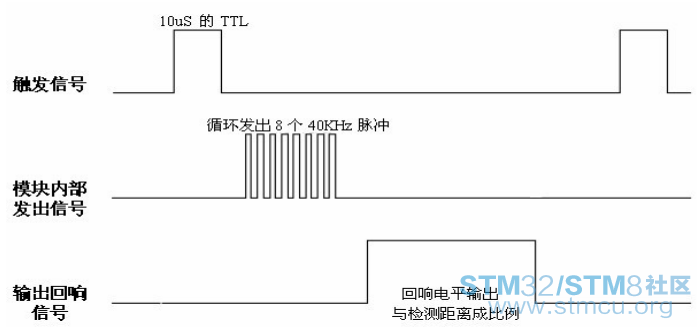
以上时序图表明你只需要提供一个 10uS以上脉冲触发信号,该模块内部将 发出8个 40kHz周期电平并检测回波。一旦检测到有回波信号则输出回响信号。 回响信号的脉冲宽度与所测的距离成正比。 由此通过发射信号到收到的回响信号时间间隔可以计算得到距离。 3:软件控制HC-SR04超声波模块 01:硬件说明 超声波模块测距触发引脚Trig--->PC6 超声波模块测距信号返回引脚Echo--->PC7 02:软件实现 实现方法:20ms触发一次测距,在定时器100us的中断里面计模块Echo返回信号高电平的时间,然后通过高电平时间*声速(340m/S)/2计算出距离,并串口打印显示。 注意:20ms触发一次测距,说明最远只能测3.4m。 主要函数说明: //控制引脚初始化 void ULsonicGPIO_Init(void); //测距使能控制 void ULsonic_Start(void); //测距函数 void ULsonic_Measure(void); 具体源代码: main.c文件 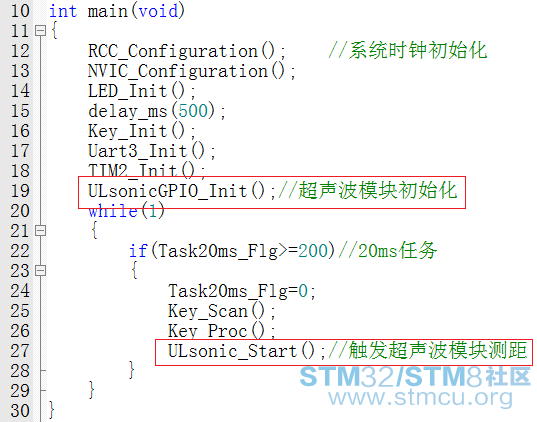
ultrasonic.h文件 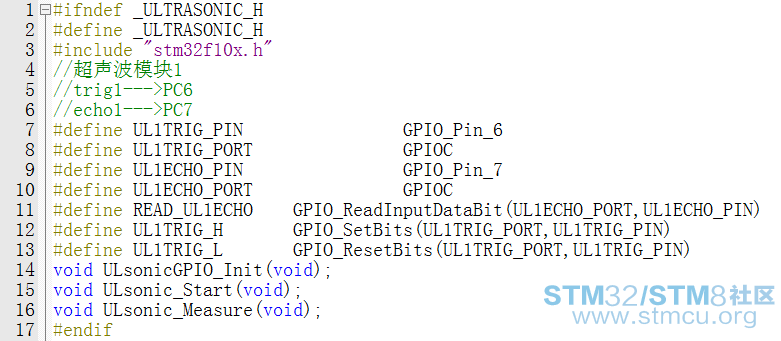
ultrasonic.c文件 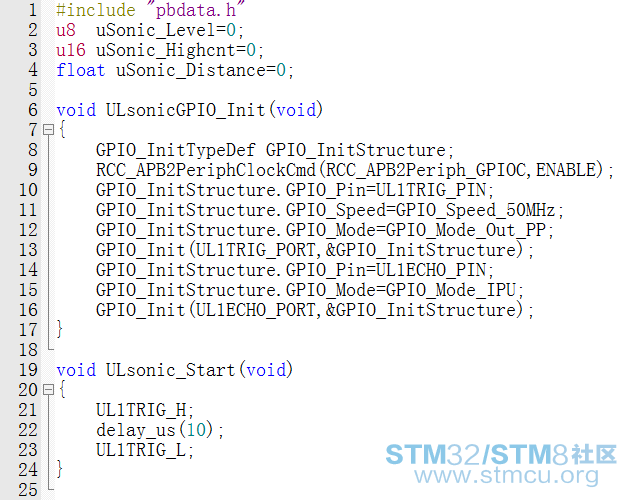
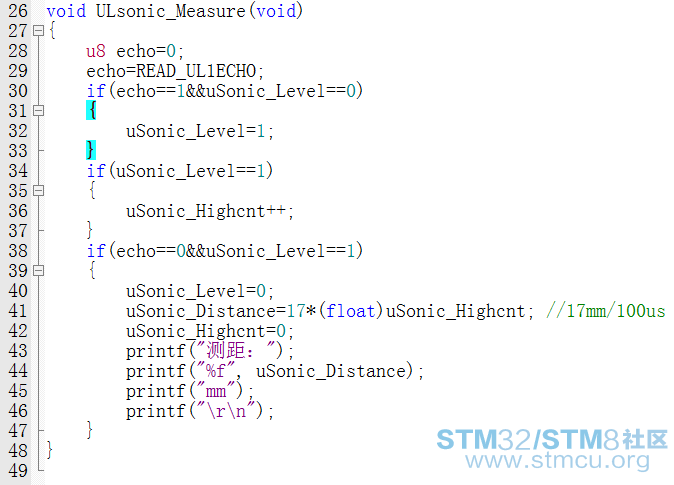
time.c文件 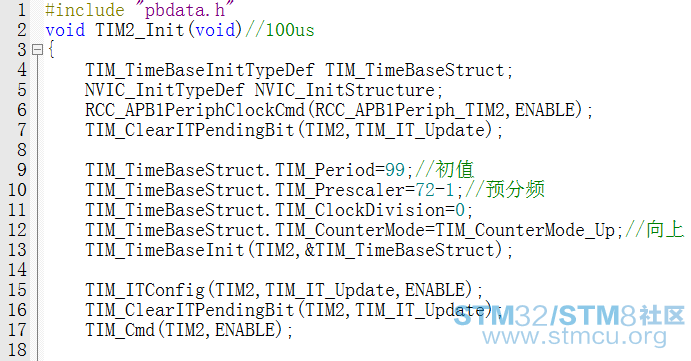
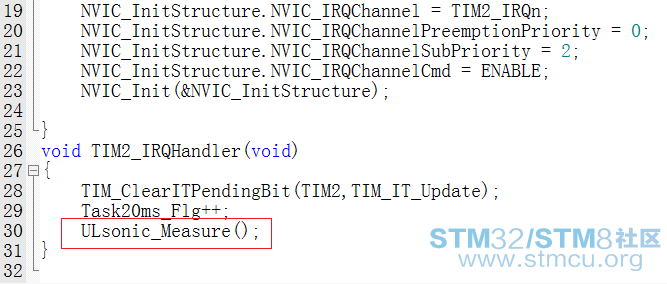
3:实验测试 01:实验平台: 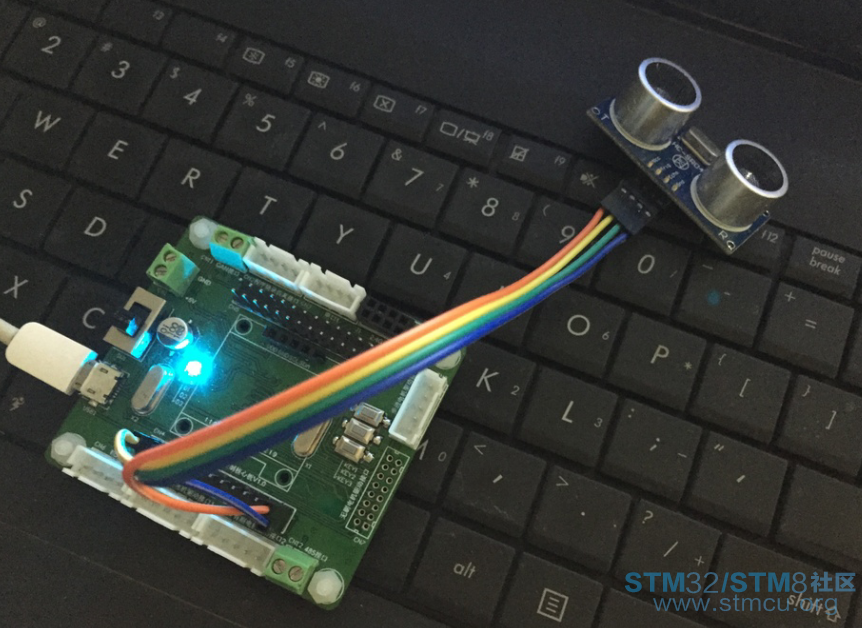
02:测试结果: 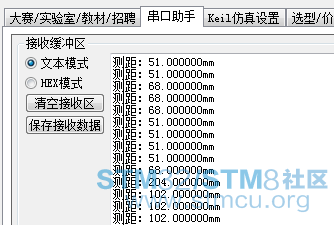
更多精彩内容请微信扫码关注 
之前发过的帖子 03:轻松搞定串口通信隔离04:STM32中断优先级管理 05:STM32单片机SWJ口引脚释放 06:真的明白Code、RO-data、RW-data和ZI-data吗? |
 微信公众号
微信公众号
 手机版
手机版

//nucleo+HC-SR04超声波模块
01:硬件说明上的
#include "mbed.h"
#include "ultrasonic.h"
void dist(int distance)
{
//put code here to happen when the distance is changed
printf("Distance changed to %dmm\r\n", distance);
}
ultrasonic mu(D8, D9, .1, 1, &dist); //Set the trigger pin to D8 and the echo pin to D9
//have updates every .1 seconds and a timeout after 1
//second, and call dist when the distance changes
int main()
{
mu.startUpdates();//start mesuring the distance
while(1)
{
//Do something else here
mu.checkDistance(); //call checkDistance() as much as possible, as this is where
//the class checks if dist needs to be called.
}
}
各有各的写法吧
定时器一路PWM控制触发以及触发周期,超声波返回信号高电平时间用定时器通道捕捉功能获取
会好一种就好了