很多时候我们都是比着原理图一点点去配置IO,配置外设,这样很容易出错,也很麻烦,对原理图研究的稍微有一点不仔细就会出错。
ST对自己的做了很好的支持,在创建工程的时候是可以直接选择对应的开发板创建,这样省下来配置引脚外设的功夫。
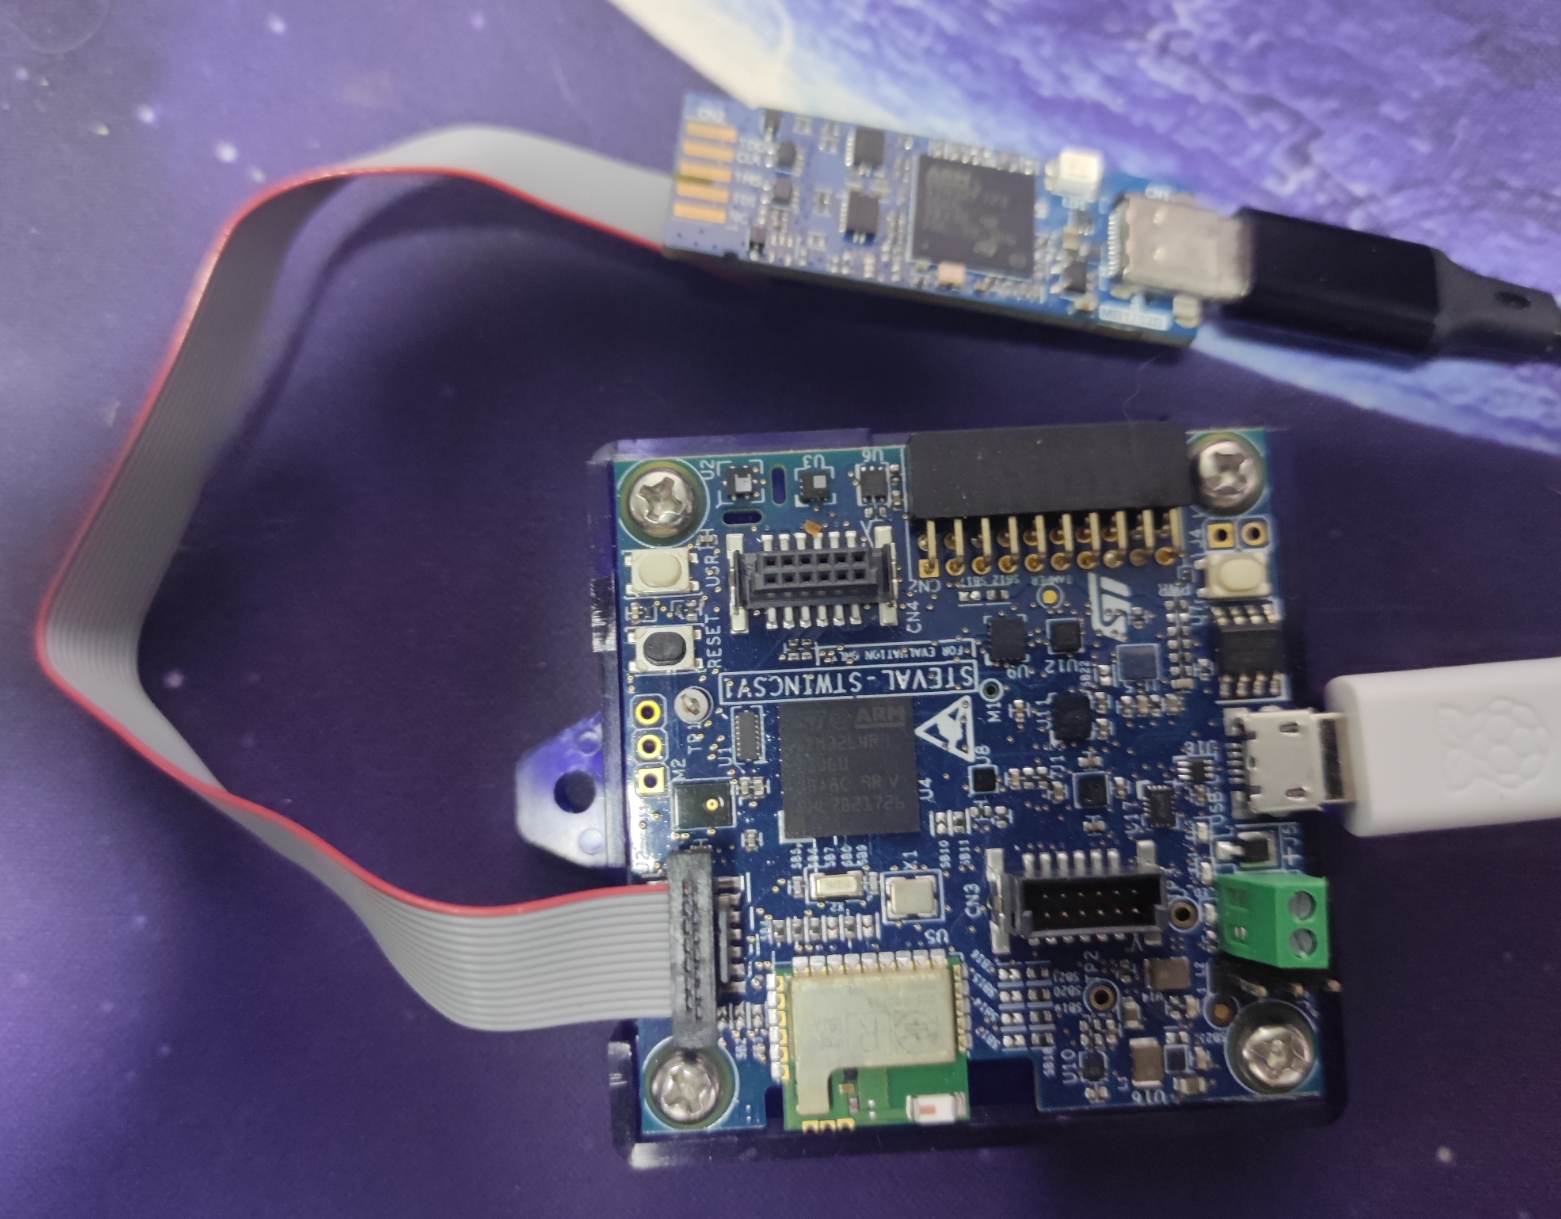
本篇我们将使用STM32CubeMX提供的板模板创建一个STEVAL-STWINKT1B的代码工程,并完成串口打印的功能。
点击ACCESS TO BOARD SELECTOR,选择板模板

选择STEVAL-STWINKT1B后,点击Start Project新建工程

点击yes,初始化外设

可以看到IO与外设部分都已经按照板卡连接,默认配置好了

点开时钟一栏也是一样

配置一下代码生成方式

配置一下工程设置,点击GENERATE CODE生成代码

查看原理图,发现串口2连接到STLink上,可以通过这里进行打印

点击配置,使能微库设置

添加下面的代码,实现串口2的重映射。
#include "stdio.h"
#ifdef __GNUC__
  #define PUTCHAR_PROTOTYPE int __io_putchar(int ch)
#else
  #define PUTCHAR_PROTOTYPE int fputc(int ch, FILE *f)
#endif

PUTCHAR_PROTOTYPE
{
  HAL_UART_Transmit(&huart2,(uint8_t *)&ch,1,0xFFFF);
  return ch;
}
修改代码,增加打印内容
int main(void)
{

  /* USER CODE BEGIN 1 */

  /* USER CODE END 1 */

  /* MCU Configuration--------------------------------------------------------*/

  /* Reset of all peripherals, Initializes the Flash interface and the Systick. */
  HAL_Init();

  /* USER CODE BEGIN Init */

  /* USER CODE END Init */

  /* Configure the system clock */
  SystemClock_Config();

  /* Configure the peripherals common clocks */
  PeriphCommonClock_Config();

  /* USER CODE BEGIN SysInit */

  /* USER CODE END SysInit */

  /* Initialize all configured peripherals */
  MX_GPIO_Init();
  MX_DMA_Init();
  MX_ADC1_Init();
  MX_DAC1_Init();
  MX_DFSDM1_Init();
  MX_I2C2_SMBUS_Init();
  MX_I2C3_Init();
  MX_I2C4_Init();
  MX_LTDC_Init();
  MX_RTC_Init();
  MX_SAI1_Init();
  MX_SDMMC1_SD_Init();
  MX_SPI1_Init();
  MX_SPI2_Init();
  MX_SPI3_Init();
  MX_TIM2_Init();
  MX_TIM5_Init();
  MX_USART2_UART_Init();
  MX_USART3_UART_Init();
  MX_USB_OTG_FS_PCD_Init();
  /* USER CODE BEGIN 2 */
  printf("STEVAL-STWINKT1B");
  /* USER CODE END 2 */

  /* Infinite loop */
  /* USER CODE BEGIN WHILE */
  while (1)
  {

    /* USER CODE END WHILE */

    /* USER CODE BEGIN 3 */
  }
  /* USER CODE END 3 */
}
由于MX_SDMMC1_SD_Init配置是需要插入内存卡才能进行的,如果没有内存卡的话需要把这个初始化注释掉,具体代码如下
int main(void)
{

  /* USER CODE BEGIN 1 */

  /* USER CODE END 1 */

  /* MCU Configuration--------------------------------------------------------*/

  /* Reset of all peripherals, Initializes the Flash interface and the Systick. */
  HAL_Init();

  /* USER CODE BEGIN Init */

  /* USER CODE END Init */

  /* Configure the system clock */
  SystemClock_Config();

  /* Configure the peripherals common clocks */
  PeriphCommonClock_Config();

  /* USER CODE BEGIN SysInit */

  /* USER CODE END SysInit */

  /* Initialize all configured peripherals */
  MX_GPIO_Init();
  MX_DMA_Init();
  MX_ADC1_Init();
  MX_DAC1_Init();
  MX_DFSDM1_Init();
  MX_I2C2_SMBUS_Init();
  MX_I2C3_Init();
  MX_I2C4_Init();
  MX_LTDC_Init();
  MX_RTC_Init();
  MX_SAI1_Init();
//  MX_SDMMC1_SD_Init();
  MX_SPI1_Init();
  MX_SPI2_Init();
  MX_SPI3_Init();
  MX_TIM2_Init();
  MX_TIM5_Init();
  MX_USART2_UART_Init();
  MX_USART3_UART_Init();
  MX_USB_OTG_FS_PCD_Init();
  /* USER CODE BEGIN 2 */
  printf("STEVAL-STWINKT1B");
  /* USER CODE END 2 */

  /* Infinite loop */
  /* USER CODE BEGIN WHILE */
  while (1)
  {

    /* USER CODE END WHILE */

    /* USER CODE BEGIN 3 */
  }
  /* USER CODE END 3 */
}
打开串口即可看到效果。

| .png) 奇迹
发布时间:2024-10-18 13:29
奇迹
发布时间:2024-10-18 13:29
 微信公众号
微信公众号
 手机版
手机版