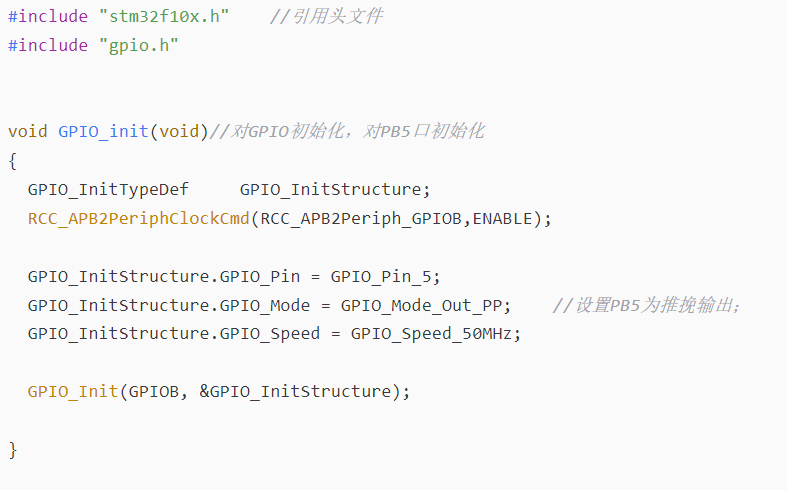
一、在keil对应的工程文件的对应位置新建gpio.h和gpio.c文件;
二、编辑gpio.c文件;
- #include "stm32f10x.h" //引用头文件
- #include "gpio.h"
-
-
- void GPIO_init(void)//对GPIO初始化,对PB5口初始化
- {
- GPIO_InitTypeDef GPIO_InitStructure;
- RCC_APB2PeriphClockCmd(RCC_APB2Periph_GPIOB,ENABLE);
-
- GPIO_InitStructure.GPIO_Pin = GPIO_Pin_5;
- GPIO_InitStructure.GPIO_Mode = GPIO_Mode_Out_PP; //设置PB5为推挽输出;
- GPIO_InitStructure.GPIO_Speed = GPIO_Speed_50MHz;
-
- GPIO_Init(GPIOB, &GPIO_InitStructure);
-
- }
-
-
- void GPIO_on(void)//PB5置1
- {
- GPIO_SetBits(GPIOB,GPIO_Pin_5);
- }
-
-
- void GPIO_off(void)//PB5置0
- {
- GPIO_ResetBits(GPIOB,GPIO_Pin_5);
- }
复制代码
三、在gpio.h文件中编辑;- #include "stm32f10x.h"
-
- #ifndef __GPIO_H
- #define __GPIO_H
-
- void GPIO_init(void);
- void GPIO_on(void);
- void GPIO_off(void);
-
- #endif
复制代码
四、在主文件main.c文件中运用即可;
- #include "stm32f10x.h"
- #include "stm32f10x_it.h"
-
- #include "gpio.h"
- #include "delay.h"
-
- int main(void)
- {
- Delay_Init();
- gpio_init();
-
- while(1)
- {
- gpio_off();//置0,即GPIOD低电平
- Delay_ms(2000);//延时
- gpio_on();//置1,即GPIOD高电平
- Delay_ms(2000);//延时
- }
- }
复制代码
————————————————
版权声明:不想写代码的小妖精
|