背景介绍
笔者在开发的时候,习惯应用自己的一套函数扩展库与工程模板,因此每次开始新的项目开发时,就会将上一个项目工程直接复制一份,在其基础上进行开发。当新项目与原项目的单片机型号不一样的时候,就涉及到如何将工程中的单片机型号的修改过来的问题。
本文将以工程中MCU型号从STM32F103C8Tx改为STM32F103VCTx为例,说明一下具体的操作步骤。
操作步骤
修改工程文件.cproject
用文本编辑器(NotePad++)打开.cproject工程文件,采用查找替换的方式,将工程文件中的原单片机型号“STM32F103C8”替换成“STM32F103VC”并保存。.project工程文件中没有需要修改的内容。
删除部分工程文件
删除XXX.elf.launch文件与XXX.map文件,这两个文件默认在工程目录文件夹中,在设置Run/Debug Configurations的时候会自动重新生成。
替换启动文件
将原来型号的启动文件(XXX.s文件)替换为startup_stm32f103vctx.s,这个启动文件可以通过在STM32CubeIDE中新建一个MCU型号为STM32F103VCTx的工程并自动生成代码而获得。也可以在源码中同时保留这些文件,而在Makefile中指定调用的文件名。
替换LinkerScript文件
将原来型号的链接文件(XXX.ld文件)替换为STM32F103VCTX_FLASH.ld,这个链接文件可以通过在STM32CubeIDE中新建一个MCU型号为STM32F103VCTx的工程并自动生成代码而获得。也可以在源码中同时保留这些文件,而在Makefile中指定调用的文件名。
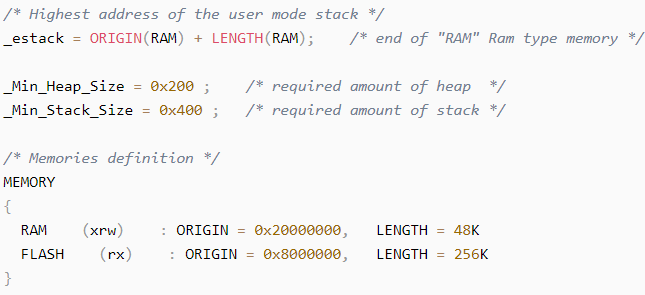
当然也可以直接修改原来的链接文件:
- /* Highest address of the user mode stack */
- _estack = ORIGIN(RAM) + LENGTH(RAM); /* end of "RAM" Ram type memory */
- _Min_Heap_Size = 0x200 ; /* required amount of heap */
- _Min_Stack_Size = 0x400 ; /* required amount of stack */
- /* Memories definition */
- MEMORY
- {
- RAM (xrw) : ORIGIN = 0x20000000, LENGTH = 48K
- FLASH (rx) : ORIGIN = 0x8000000, LENGTH = 256K
- }
主要修改的地方就在堆栈空间分配与RAM, Flash空间的定义。
修改Makefile文件
主要修改涉及到单片机型号、启动文件、链接文件等的内容:
- LINK_SCRIPT = "STM32F103VCTX_FLASH.ld"
- ASSEMBLER_FLAGS =-c -g -O0 -mcpu=cortex-m3 -mthumb \
- -D"STM32F10X_HD" -D"USE_STDPERIPH_DRIVER" -x assembler-with-cpp $(INCLUDE_DIR)
-
- COMPILER_FLAGS =-c -g -MMD -mcpu=cortex-m3 -O0 -Wall \
- -ffunction-sections -fdata-sections -mthumb \
- -D"STM32F10X_HD" -D"USE_STDPERIPH_DRIVER" $(INCLUDE_DIR)
启动文件由于属于汇编文件,因此只要替换即可:
- SRCSASM := $(wildcard */*/*/*/*/*/*/*/*.s) \
- $(wildcard */*/*/*/*/*/*/*.s) \
- $(wildcard */*/*/*/*/*/*.s) \
- $(wildcard */*/*/*/*/*.s) \
- $(wildcard */*/*/*/*.s) \
- $(wildcard */*/*/*.s) \
- $(wildcard */*/*.s) \
- $(wildcard */*.s)
当然,如果存在多个启动文件,可以排除不匹配的型号对应的文件:
- #SRCSASM := $(filter-out Source/StdPeriLib/Startup/startup_stm32f103vctx.s, $(SRCSASM))
- SRCSASM := $(filter-out Source/StdPeriLib/Startup/startup_stm32f10x_md.s, $(SRCSASM))
Alwhales库的修改
需要修改eeprom.h中关于flash划分作为eeprom的地址范围。
对于C8T6型号,flash的结束地址为“0x08010000”;
对于VCT6型号,flash的结束地址为“0x08040000”;
- #if defined (STM32F10X_LD) || defined (STM32F10X_MD)
- #define PAGE_SIZE (uint16_t)0x400 /* Page size = 1KByte */
- #define FLASH_END_ADDRESS 0x08010000
- #elif defined (STM32F10X_HD) || defined (STM32F10X_CL)
- #define PAGE_SIZE (uint16_t)0x800 /* Page size = 2KByte */
- #define FLASH_END_ADDRESS 0x08040000
- #endif
- /* EEPROM start address in Flash */
- #define EEPROM_START_ADDRESS ((uint32_t)(FLASH_END_ADDRESS - 2 * PAGE_SIZE))
由于已经设置好了条件编译,只需要在合适的位置(默认在stm32f10x.h中):
标准库的修改
在stm32f10x.h文件中,需要根据所使用的MCU型号,选择对应的宏定义:
- /* Uncomment the line below according to the target STM32 device used in your
- application
- */
- #if !defined (STM32F10X_LD) && !defined (STM32F10X_LD_VL) && !defined (STM32F10X_MD) && !defined (STM32F10X_MD_VL) && !defined (STM32F10X_HD) && !defined (STM32F10X_HD_VL) && !defined (STM32F10X_XL) && !defined (STM32F10X_CL)
- /* #define STM32F10X_LD */ /*!< STM32F10X_LD: STM32 Low density devices */
- /* #define STM32F10X_LD_VL */ /*!< STM32F10X_LD_VL: STM32 Low density Value Line devices */
- /* #define STM32F10X_MD */ /*!< STM32F10X_MD: STM32 Medium density devices */
- /* #define STM32F10X_MD_VL */ /*!< STM32F10X_MD_VL: STM32 Medium density Value Line devices */
- #define STM32F10X_HD /*!< STM32F10X_HD: STM32 High density devices */
- /* #define STM32F10X_HD_VL */ /*!< STM32F10X_HD_VL: STM32 High density value line devices */
- /* #define STM32F10X_XL */ /*!< STM32F10X_XL: STM32 XL-density devices */
- /* #define STM32F10X_CL */ /*!< STM32F10X_CL: STM32 Connectivity line devices */
- #endif
- /* Tip: To avoid modifying this file each time you need to switch between these
- devices, you can define the device in your toolchain compiler preprocessor.
- - Low-density devices are STM32F101xx, STM32F102xx and STM32F103xx microcontrollers
- where the Flash memory density ranges between 16 and 32 Kbytes.
- - Low-density value line devices are STM32F100xx microcontrollers where the Flash
- memory density ranges between 16 and 32 Kbytes.
- - Medium-density devices are STM32F101xx, STM32F102xx and STM32F103xx microcontrollers
- where the Flash memory density ranges between 64 and 128 Kbytes.
- - Medium-density value line devices are STM32F100xx microcontrollers where the
- Flash memory density ranges between 64 and 128 Kbytes.
- - High-density devices are STM32F101xx and STM32F103xx microcontrollers where
- the Flash memory density ranges between 256 and 512 Kbytes.
- - High-density value line devices are STM32F100xx microcontrollers where the
- Flash memory density ranges between 256 and 512 Kbytes.
- - XL-density devices are STM32F101xx and STM32F103xx microcontrollers where
- the Flash memory density ranges between 512 and 1024 Kbytes.
- - Connectivity line devices are STM32F105xx and STM32F107xx microcontrollers.
- */
|
.png) STMCU小助手
发布时间:2022-4-14 10:31
STMCU小助手
发布时间:2022-4-14 10:31
 微信公众号
微信公众号
 手机版
手机版