前面是关于怎样运行fpu的,以及相关的环境配置
FFT的测试
先看一段关于官方的FFT测试例程
里面添加了相关注释
- #include "arm_math.h"
- #include "arm_const_structs.h"
- #define TEST_LENGTH_SAMPLES 2048
- /* -------------------------------------------------------------------
- * External Input and Output buffer Declarations for FFT Bin Example
- * ------------------------------------------------------------------- */
- extern float32_t testInput_f32_10khz[TEST_LENGTH_SAMPLES];
- static float32_t testOutput[TEST_LENGTH_SAMPLES/2];
- /* ------------------------------------------------------------------
- * Global variables for FFT Bin Example
- * ------------------------------------------------------------------- */
- uint32_t fftSize = 1024;
- uint32_t ifftFlag = 0;
- uint32_t doBitReverse = 1;
- /* Reference index at which max energy of bin ocuurs */
- uint32_t refIndex = 213, testIndex = 0;
- /* ----------------------------------------------------------------------
- * Max magnitude FFT Bin test
- * ------------------------------------------------------------------- */
- int32_t main(void)
- {
- arm_status status;
- float32_t maxValue;
- status = ARM_MATH_SUCCESS;
- //注意这个模块的参数的相关用法,下面这个将是我们后面进行调用的函数模块
- /* Process the data through the CFFT/CIFFT module */
- arm_cfft_f32(&arm_cfft_sR_f32_len1024, testInput_f32_10khz, ifftFlag, doBitReverse);
- //可以看到要想使用此函数,将调用4个参数
- //参数1:指向浮点CFFT结构的一个实例。两种:arm_cfft_sR_f32_len1024、arm_cfft_sR_q31_len1024;
- //参数2:数据缓冲区的起始地址,偶数位为实数位,奇数位为复数
- //参数3:是否逆FFT标志位;1-是
- //参数4:是否位反转输出标志位;1-是
- //注意:此函数将覆盖源数据,并将其修改为对应操作后的数据
- //计算频域的幅度,由于对称性,只取前一半
- /* Process the data through the Complex Magnitude Module for
- calculating the magnitude at each bin */
- arm_cmplx_mag_f32(testInput_f32_10khz, testOutput, fftSize);
- //计算频域的最大值
- /* Calculates maxValue and returns corresponding BIN value */
- arm_max_f32(testOutput, fftSize, &maxValue, &testIndex);
- if (testIndex != refIndex)
- {
- status = ARM_MATH_TEST_FAILURE;
- }
- /* ----------------------------------------------------------------------
- ** Loop here if the signals fail the PASS check.
- ** This denotes a test failure
- ** ------------------------------------------------------------------- */
- if ( status != ARM_MATH_SUCCESS)
- {
- while (1);
- }
- while (1); /* main function does not return */
- }
实际使用后的测试
实际使用的时候,我们并不是使用对应的源代码c文件,而是使用对应的lib文件。
当我移植到工程中后,等下发布效果,不要在意上面如何能够运行,弄完后自己再实现。
python处理源数据得到频谱
源数据有2048个数据,但实际是由实部和虚部组成的,所以实际只有1024个数据点
python会得到一部分负频率的成分,但是一般我们只讨论正频率部分
stm32处理源数据得到频谱
这是stm32通过串口上传至电脑,然后用excel绘制的图像
两个结果一致
FFT如何使用
源数据------》调用相关函数-----》频域
频域中的各个点对应着相应的频率,幅值对应着当期成分的含量占比大小
cubemx的工程建立
和普通的工程一样,不过建立之前需要注意勾选,复制所有文件到当前工程中;如果后面发现没有我们要的文件,可能是这一步的问题
添加相应的库文件
先来查看工程文件夹中的一些文件
这里面的文件目录是:
工程文件夹\Drivers\CMSIS\Lib\ARM
里面就是我们所需的库文件
下面添加到我们的工程中:
然后设置添加文件的类型:
选中小端模式的库,然后点击add,如果选错了,后面将不能编译,然后点击关闭窗口
Keil工程的设置
开启FPU并设置编译器:
将下面的东西复制到后面的图片中
- ,__FPU_PRESENT=1,__FPU_USED=1,ARM_MATH_CM7,__CC_ARM
然后添加一些文件
在这里输入
…/Drivers/CMSIS/DSP/Include
结果像这样
然后点击ok
还要设置一个东东
这里使用的是STM32H750,所以后面提到的ARM_MATH_CM7后缀是M7
现在就可以使用库里面的函数了
下面是测试
进行FFT测试
测试一
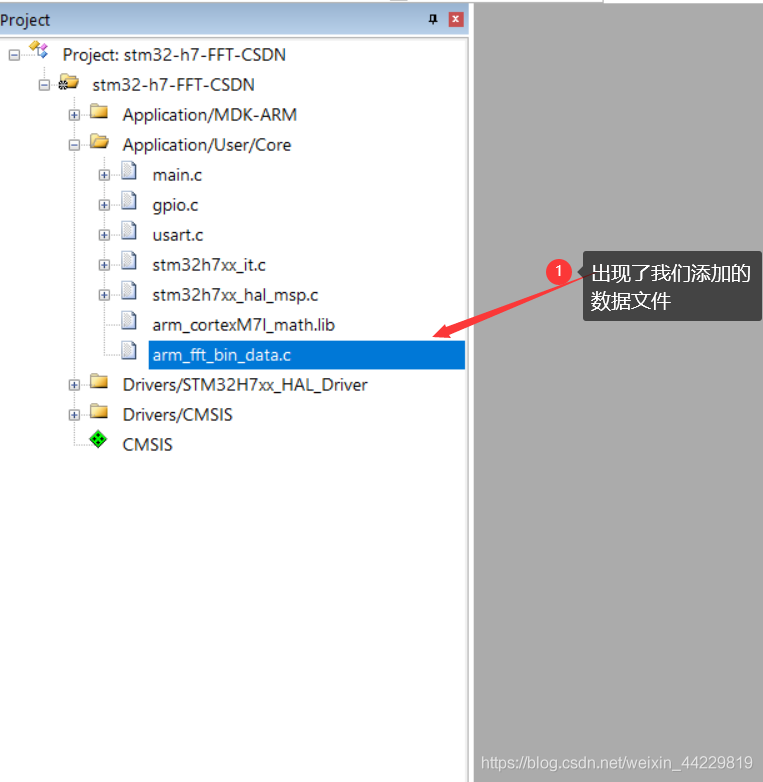
添加测试文件
使用的是官方测试文件
这是例程所在目录
然后打开我们的main.c进行编辑
注意:
我用的是uart4进行的串口通信
- #include <stdio.h>
- #include "arm_math.h"
- #include "arm_const_structs.h"
- #define TEST_LENGTH_SAMPLES 2048
- extern float32_t testInput_f32_10khz[TEST_LENGTH_SAMPLES];//only have 1024
- static float32_t testOutput[TEST_LENGTH_SAMPLES/2];
- uint32_t fftSize = 1024;
- uint32_t ifftFlag = 0;
- uint32_t doBitReverse = 1;
- /* Reference index at which max energy of bin ocuurs */
- uint32_t refIndex = 213, testIndex = 0;
- int fputc(int ch,FILE *f)
- {
- uint8_t temp[1]={ch};
- HAL_UART_Transmit(&huart4,temp,1,2); //uart4 一定要修改为自己的串口!!!!!!!!!!!!
- }
然后

- arm_status status;
- float32_t maxValue;
- status = ARM_MATH_SUCCESS;
- /* Process the data through the CFFT/CIFFT module */
- arm_cfft_f32(&arm_cfft_sR_f32_len1024, testInput_f32_10khz, ifftFlag, doBitReverse);
- /* Process the data through the Complex Magnitude Module for
- calculating the magnitude at each bin */
- arm_cmplx_mag_f32(testInput_f32_10khz, testOutput, fftSize);
- /* Calculates maxValue and returns corresponding BIN value */
- arm_max_f32(testOutput, fftSize, &maxValue, &testIndex);
- if (testIndex != refIndex)
- {
- status = ARM_MATH_TEST_FAILURE;
- }
- /* ----------------------------------------------------------------------
- ** Loop here if the signals fail the PASS check.
- ** This denotes a test failure
- ** ------------------------------------------------------------------- */
- if ( status != ARM_MATH_SUCCESS)
- {
- while (1);
- }
- while (1)
- {
- //printf("hello\n");
- HAL_Delay(5000);
- for(int i =0;i<1024;i++)
- {printf("%f\n",testOutput<i>);
- </i>HAL_Delay(10);
- }
- while(1);
- }
这里完了就可以编译了
结果探究
打开串口助手,等待5s后会发送
然后提取之后就是我们要的数据了,可以保存后用excel来进行绘制,就是我们上面的图像了
|
.png) STMCU小助手
发布时间:2021-12-26 16:43
STMCU小助手
发布时间:2021-12-26 16:43


 微信公众号
微信公众号
 手机版
手机版